
4D v16.3
Using object views
- 4D Design Reference
-
- Building forms
-
- Form editor
- Form properties
- Form Properties (Explorer)
- Creating a multi-page form
- Using inherited forms
- Modifying data entry order
- Inserting and organizing form objects
- Setting object display properties
- Rotation of text
- Using static pictures
- Using references in static text
- Duplicating on a matrix
- Incrementing a set of variables
- Scaling a form
- Using object methods
- Using object views
- Using shields
- Using the preconfigured library
- Creating and using custom object libraries
- Displaying information about objects on forms being executed
 Using object views
You can use different views in 4D forms. This makes it easier to build complex forms by distributing objects among separate views that can then be hidden or shown as needed. For example, you can distribute objects according to type (fields, variables, static objects, etc.). Any type of object, including subforms and plug-in areas, can be included in views.
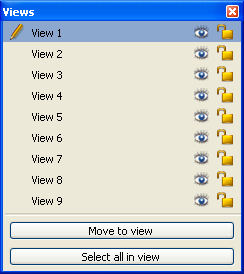
There are 9 views available per form, named View 1 to View 9 by default (these names can be changed). Each view can be displayed or hidden and locked. View management is done through the views palette:
To display this palette, click the view button in the window toolbar  or choose the View List command in the editor context menu or in the Form menu.
Here are a few rules for working with views:
- Context of use: Views are a purely graphic tool that can only be used in the Form editor; you cannot access views programmatically or in the Application environment.
- Views and pages: Objects of the same view can belong to different form pages; only objects of the current page (and of page 0 if it is visible) can be displayed, regardless of the view configuration.
- Views and levels: Views are independent of object levels; there is no display hierarchy among different views.
- Views and groups: Only objects belonging to the current view can be grouped.
Note: In forms created by default or using the Form Wizard, the title is placed in View 2 and the action buttons (picture buttons) in View 3.
An object can only belong to a single view. Any object created in a form is placed in the current view. By default, View 1 is selected; consequently, all objects are placed in the first view of the form.
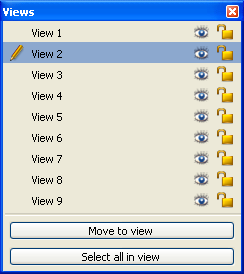
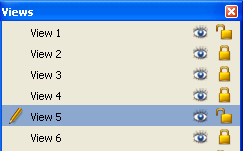
To create an object in another view, simply select the view beforehand in the palette by clicking its line:
It is also possible to move one or more object(s) from one view to another. To do this, select the object(s) in the form whose view you wish to change. The view list indicates, using a symbol, the view to which the selection belongs:
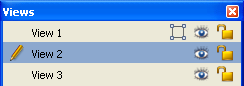
Note: The selection can contain several objects belonging to different views.
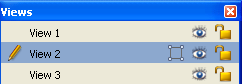
Then, simply select the destination view of the selection and click Move to view. The selection is then placed in the new view:
Note: You can display the view in which each object is found using the 4D shields. For more information on this, refer to Using shields.
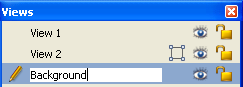
You can rename each of the 9 views, for example, if you want to give a name that describes the object contents. You can rename the 9 views differently in each database form.
To rename a view, you can use either Ctrl+click (Windows) or Command+click (Mac OS) on the view name, or double-click the view name (the selected view in this case). The name then becomes editable:
Once you put each object in a view, you can use the views palette to:
- Select all objects of the same view in just one click,
- Display or hide objects for each view,
- Lock the objects of a view.
You can select all objects belong to the same view in the current page of the form. This function is useful for applying global changes to a set of objects.
To do this, select the view in which you wish to select all the objects and click Select all in view.
You can show or hide objects belonging to a view at any time in the current page of the form. This way you can focus on certain objects when editing the form for example.
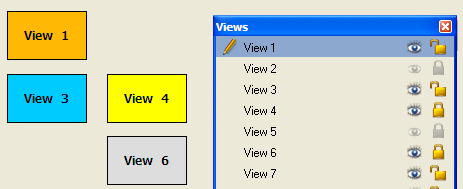
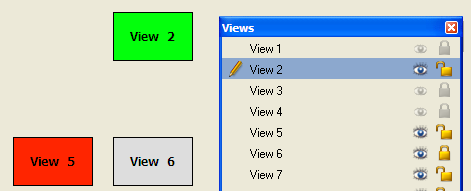
By default, all views are shown, as indicated by the  icon next to each view in the palette. To hide a view, click this icon. It is then dimmed and objects of the corresponding view are no longer shown in the form:
Note: The current view (selected in the list of views) cannot be hidden.
To show a view that is hidden, you can select it or click on the display icon again.
You can lock objects of a view, which prevents them from being selected, changed or deleted from the form. Once locked, an object cannot be selected by a click, a rectangle or the Select Similar Objects command of the context menu. This function is useful for preventing handling errors.
By default, all views are unlocked, as indicated by the  icon next to each view in the views palette. To lock the objects of a view, click this icon. The padlock is shut, which means that the view is now locked:
Note: The current view (selected in the list of views) cannot be locked.
To unlock a view, you can select it or click on the lock icon again.

Product: 4D
Theme: Building forms
4D Design Reference ( 4D v16)
4D Design Reference ( 4D v16.1)
4D Design Reference ( 4D v16.3)


