
4D v16.3
Output forms
 Output forms
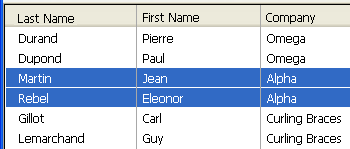
An output form lists records. Although any form can be used as an output form, most output forms have these features:
- Each row is a record.
- Each column is a field or a variable.
- Each column is labeled at the top of the window. The columns can be resized using the splitters between each title area.
- The header and/or footer of the form may contain buttons, pop-up menus, etc.
An output form has standard horizontal and vertical scroll bars. You can scroll records by clicking either of the scroll arrows, clicking the scroll bar, or dragging the scroll box. You can also use the PgUp and PgDn keys (to scroll through the list of records one screen “page” at a time) or the Start and End keys (to go directly to the start or end of the list).
If the output form has more fields than can be displayed in the window, you can scroll horizontally using the scroll bar at the bottom of the window.
You can resize the output form columns (except when this possibility has been removed in the form editor). To do so, place the mouse cursor over the title area of the columns; the cursor changes in order to indicate that the column can be resized. You can then click and move the edge of the column in order to reduce or enlarge it:

You highlight (select) a record by clicking it. You can highlight a single record, two or more adjacent records, or two or more non-adjacent records. After highlighting records, you can perform operations such as displaying them as a subset or deleting them.
- To highlight a record, click on a record displayed in the output form or press the up or down arrows. The record you clicked is highlighted. If you use the arrow keys, the first or last record of the list is highlighted.
- To highlight several adjacent records, click the first record you want to highlight, hold down the Shift key and click the last record you want to highlight (or press the up or down arrows). All records between the first and last ones you clicked are highlighted.
- To highlight several non-adjacent records, click the first record you want to highlight, hold down the Ctrl key (Windows) or Command key (Macintosh) and click another (or several other) records. Each record you click is highlighted.
- To highlight the entire current selection of records in the output form, choose Select All from the Edit menu or use the standard Ctrl+A (Windows) or Command+A (Mac OS) shortcut.
To highlight all the records in the table, choose Show All from the Records menu before choosing Select All from the Edit menu.
Required form object color settings for highlight
For a depiction of highlight in compliance with interface standards, the following settings must be applied to text and background color for objects located within the form body area:
- Automatic option for the text color of each object,
- Transparent option for the background color of each object,
- Automatic option for the color of the rectangle located beneath the form body area.
These settings are automatically applied in default output forms.
You can add and modify records directly in an output form. The output form is especially useful for modifying a few adjacent records because several records are displayed on the screen simultaneously.
You can only enter or modify fields in the current table. You cannot enter or modify data in variables, fields from other tables, or subforms.
In the output form, you can:
- Select and edit fields by clicking on them (you have to click twice if the record is not already selected),
- Move from field to field and record to record using the Tab, Enter or Return keys,
- Add a new record, using the Records > New Record in List menu command.
Hitting the Tab, Enter or Return keys, or clicking on another field saves your changes.
In list mode, 4D displays, if necessary, empty lines below the last displayed records, so that it fills the entire window:
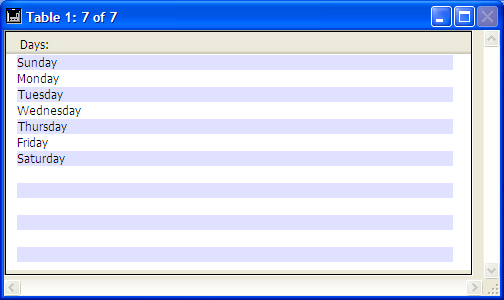
When the window is displayed, the On Display Detail form event is generated for each empty line of the list. In this case, there is no current record: Record number returns -1 and Selected record number does not return a significant value. The Displayed line number command lets you find out the number of the line currently being displayed.
A list form that is created using the Form Wizard works well for displaying a list of records. If needed, you can make the following simple modifications:
- Replace fields with variables and add methods,
- Use the platform interface, appearance, font attributes, fill, border, or color options to modify individual objects on the form,
- Change the widths of the fields or variables,
- Move the output control lines,
- Add a custom graphic in the Header area,
- Add variables in the Header or Footer area.
The following is a custom output form being used for managing personnel:

The control buttons have been placed in the footer area and a custom picture has been placed in the header area. The Header area also includes a drop-down list that lets you select the company whose employees you want to display.
Here is what the design for this form looks like in the Form editor:

The control lines can be moved, for example, in order to adapt to the size of the picture inserted into the header area.
You may want to display fields on more than one line. 4D allows you to use several lines for each record. Expand the Detail area so that more than one line appears in this area. When you use several lines for a single record, graphic elements such as lines and boxes can be useful to separate fields and records.
Here is an example of an output form for a phone message management database which uses two lines per record:
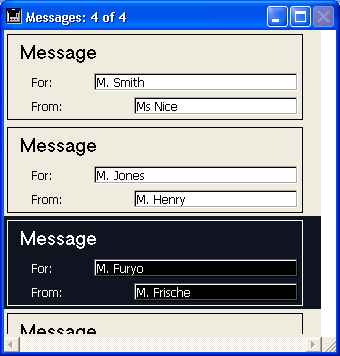
The Visible display property is available for all objects in the Form editor when the form is a list form. This property accepts three values:
- Always visible
- If record selected
- If record not selected
This property is only used when drawing objects located in the body of a list form. It tells 4D whether or not to draw the object depending on whether the record being processed is selected/not selected.
This property allows you to represent a selection of records using visual attributes other than colors:
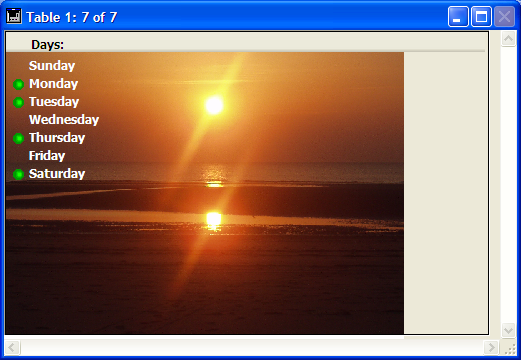
4D does not take this property into account if the object was hidden using the OBJECT SET VISIBLE command; in this case, the object remains invisible regardless of whether or not the record is selected.
If empty lines are displayed after the last records (see the “Managing empty lines” section), 4D draws the objects with the Always visible or If record not selected property in each empty line.

Product: 4D
Theme: Output forms and reports
4D Design Reference ( 4D v16)
4D Design Reference ( 4D v16.1)
4D Design Reference ( 4D v16.3)


