4D v16.3
Creating labels
4D v16.3
Creating labels
 Creating labels
You can generate labels with either the Label editor or a custom report form. If you use a report form, you have more extensive customization options. In particular, you can use the Form editor to insert variables within your labels.
Once you have created a label report form in the Form editor of 4D, you can use it in two ways:
- Using the PRINT LABEL command
The PRINT LABEL([myTable]) statement causes the printing of the current selection of table in the current List form. In this case, 4D uses the markers (width and height) of this form to set the label format. - Using the Label editor
This operation allows you to benefit from both the advanced functions of the Form editor and the layout parameters of the Label editor.
The Label editor only takes the absolute position of the objects present in the form, as well as any margins set, into account. The positions of the markers are ignored.
To create a label report form and print it using the PRINT LABEL command:
- Set the label width by dragging the width marker on the bottom ruler of the Form editor.
The width marker determines how many labels the PRINT LABEL command prints across the page. The placement of the width marker should correspond to the width of your labels. Be sure to take the left and right margins of your labels into account.
You can determine these margins by calculating the space between each label and dividing this number by two. For example, if you have labels that are 2.25 inches wide with a margin of .125 inches (1/8 inch) on either side of each label, the label width marker should be placed at 2.625 inches (2 3/8 inches) to ensure that the label text is placed correctly on the labels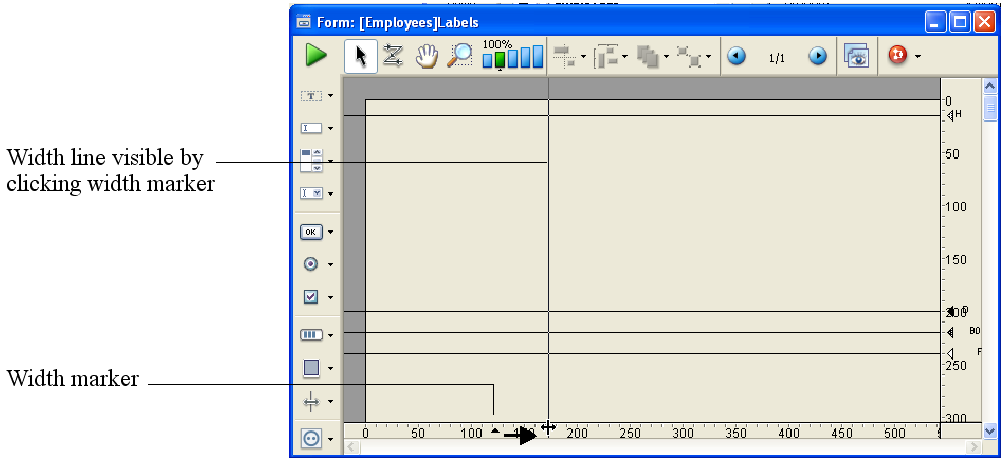
Note: You may want to change the ruler units in the form to inches to make it easier to determine the proper placement of the label width marker. To change the ruler units, choose Define Ruler Units from the Form menu and select Inches. - Insert and set the objects making up each label.
Labels may contain fields and active objects (with which you can associate methods if desired), as well as graphic objects and static text. A subform cannot be printed in a label.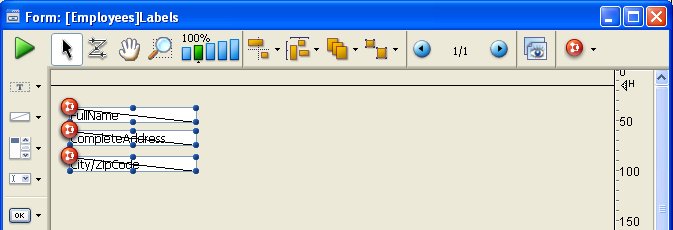
This label contains variables (active objects) whose values are calculated by object methods. For example, the method of the FullName variable concatenates the first and last name of each person and places a space between them:FullName:=[Customers]FirstName+" "+[Customers]LastName - Position the objects in the form with respect to the width marker.
The label elements must be placed to the left of the width marker. They must be centered between the left edge of the form and the marker in order for the space on each side of the label to be the same. - Set the control lines so that the Header control line is above the label and the Detail, Break, and Footer control lines are below the label.
The Header control line should be set at zero inches and the Detail control line should be set to the height of the label. To center the text within the label, center the form elements between the Header control line and the Detail control line.
When you print the labels, everything between the Header and the Detail control lines appears on the labels. - Save the form and print the selection using the PRINT LABEL command.
To create a label report form and print it using the Label editor:
- In the form, insert and set the objects making up each label.
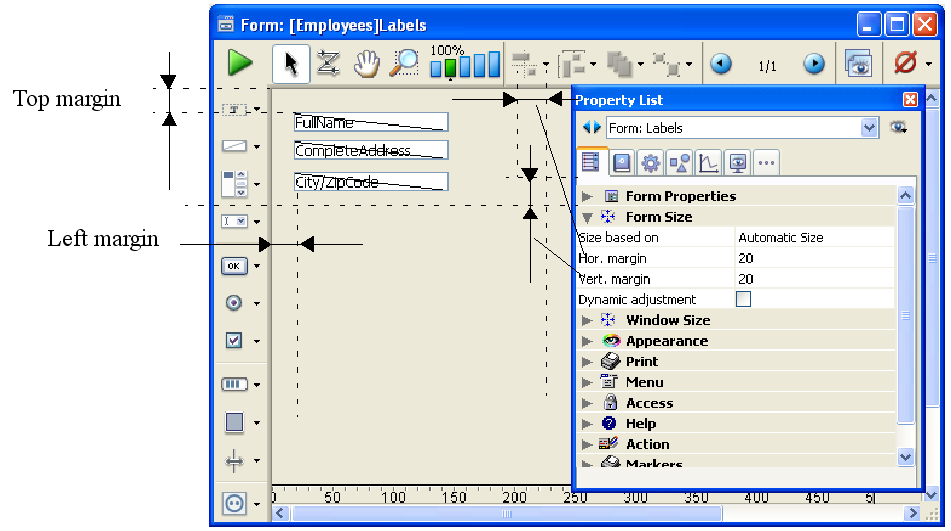
- Position each element in the label according to the following principles:
- The left and top margin of each label is determined by the position of the elements with respect to the (0,0) coordinates of the form.
- The right and bottom margin of each label is determined by the Hor. margin and Vert. margin values set in the Property List of the form.
- Choose the label form from the List of Tables window to make it the current output form for the table.
If the List of Tables window is not already displayed, choose the Tables List command in the Records menu. - Choose Labels from the Report menu.
The Label editor appears. - Choose the label form you designed from the “Form to use” drop-down list.
This tells 4D to use this form to print the labels.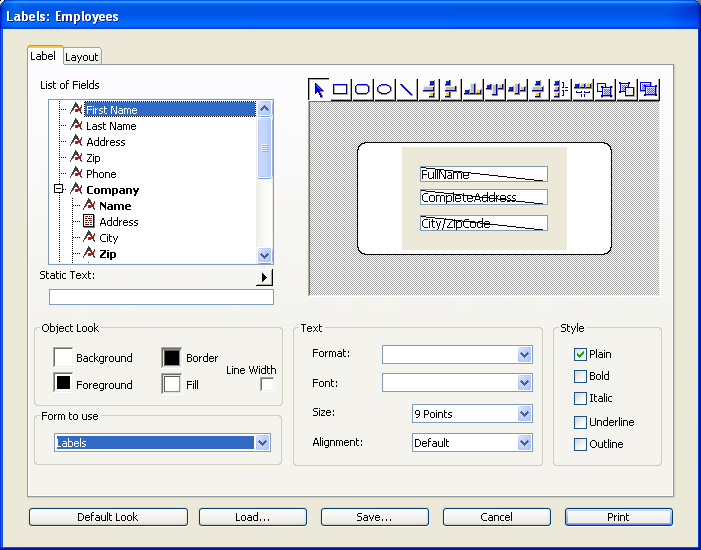
- Make any other changes to the Label editor such as setting the label margins or specifying the font in which the text appears.
For complete information about using the Label editor, refer to the Label editor chapter. - Click the Print button.
4D prints the current selection of records using your label report design.
See also

PROPERTIES
Product: 4D
Theme: Output forms and reports
HISTORY
ARTICLE USAGE
4D Design Reference ( 4D v16)
4D Design Reference ( 4D v16.1)
4D Design Reference ( 4D v16.3)


© 1985-2018 4D SAS / 4D, Inc. All rights reserved.