
4D v16.3
Creating mail-merge documents
- 4D Design Reference
-
- Output forms and reports
-
- Overview
- Output forms
- Forms for printed reports
- Using output control lines
- An example report
- Creating mail-merge documents
- Creating labels
 Creating mail-merge documents
You can handle mail-merge tasks using an output form that embeds fields, field or table labels, or variables in a static text area. You can create documents that are the same in every respect except for names, addresses, and any special calculations you want to perform.
Mail-merge documents may be useful when you want to announce a special offer or inform your customers or partners of a business development (such as a move to a new location or a significant personnel change). Another typical use of mail-merge is to inform customers that their account is due. You can create a variable and a method to calculate the exact amount.
When you create a form that does mail-merge, choose the Detail Form for Printing option in the Form Type drop-down list of the Form Wizard. In the Form editor, create a text area that will contain both the static text and the fields, variables, or table or field labels that will change for each record. You then embed fields or variables in the text area. During printing, values from the fields or variables are inserted in the text.
The figure below shows fields and variables placed in a text area.
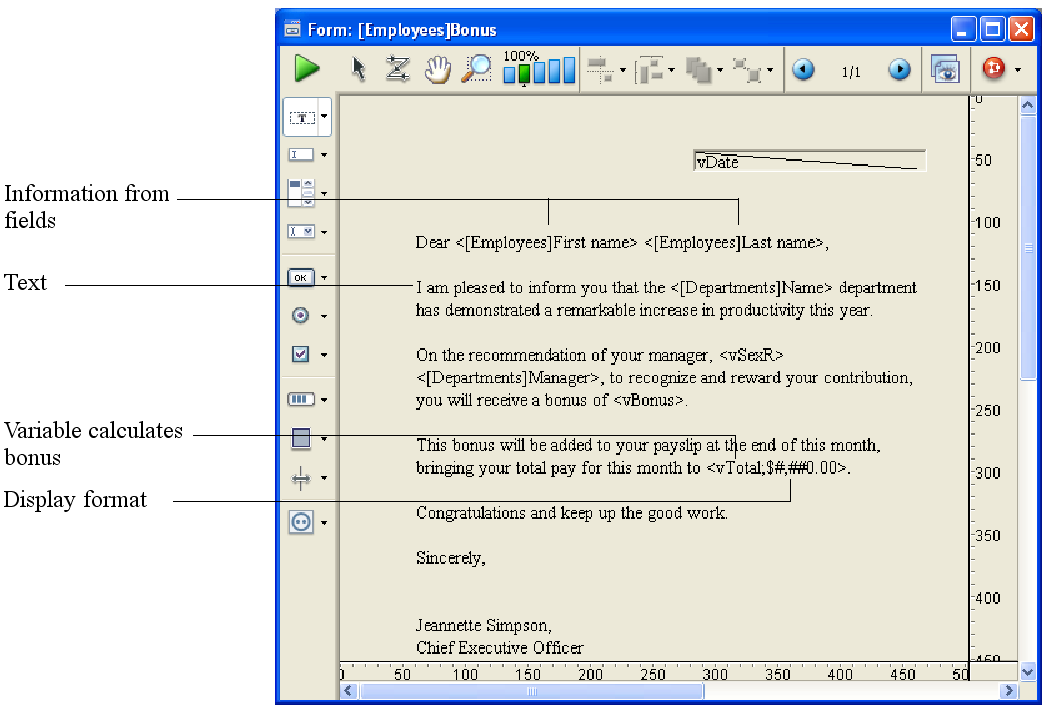
To create an output form for a mail-merge, specify a form of the type "detail form for printing". In the Detail area, add one or more static text areas.
In the text area, type the text you want in your form letter, placing field and variable names between less than (<) and greater than (>) symbols where you want information from fields or variables to be inserted.
You can use a field from any table in the database. Fields from the master table do not have to specify the table name; they can be entered like this: <Field>. Fields from other tables must specify the table name; they are entered like this: <[TableName] Field>. When the form is printed, the information from the field for each record replaces the <Field> element in the text area.
To insert table labels, enter: <?[Table Name]> or <?[N]> where N is the creation order for the table. To insert field labels, enter: <?[Table Name]Field Name> or <?[X]Y> where X is the creation order for the table and Y is the creation order for the field or <?Y> to insert a field of the current table. For more information, refer to Using references in static text.
A variable must be assigned a value in an object or form method.
You can specify how an embedded field or variable is displayed by inserting a semicolon followed by a display format (see GET LIST ITEM PARAMETER) directly after the field or variable name. For example, the mail-merge document shown above includes a display format for the vTotal variable. The embedded variable <vTotal;$###,##0.00> calculates the amount of the person’s total pay for the month and displays it in a dollar format.
4D provides a shortcut for inserting fields in a text area. The shortcut allows you to choose the field name from a drop-down menu. To do this, click with the text tool to place the insertion point where you want to insert the field then position the pointer in the text area and hold down the Alt key (Windows) or Option key (Mac OS) while you press and hold down the mouse button.
4D displays a pop-up menu of fields from the master table from which you can choose the field you want.
To choose a field from another table in the database, hold down Shift+Alt (Windows) or Shift-Command (Mac OS) while you press and hold down the mouse button. 4D displays a hierarchical menu of tables and fields in the database.
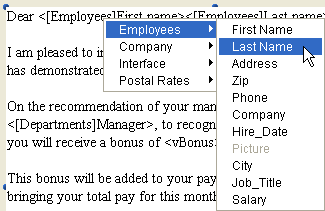
4D places <Field> or <[Table]Field> in the text area at the insertion point.
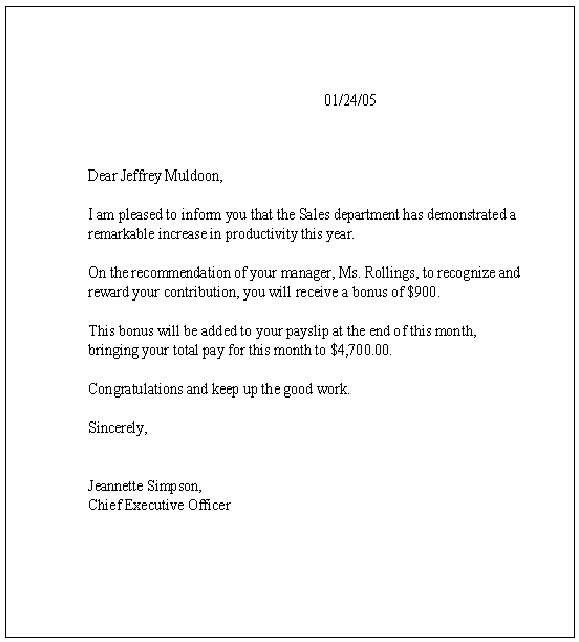
When the report is printed, the values of the fields and variables embedded in the letter appear for each record:


Product: 4D
Theme: Output forms and reports
4D Design Reference ( 4D v16)
4D Design Reference ( 4D v16.1)
4D Design Reference ( 4D v16.3)


