
4D v16.3
Attaching menus
 Attaching menus
Once you have created a menu, you can attach it to a menu bar. This can be done by drag and drop, by the options menu or by the context menu of the central area.
- Using drag and drop: Click on a menu bar in order to display its contents in the central list; select a menu in the left-hand list and drag it to the desired location in the central list.
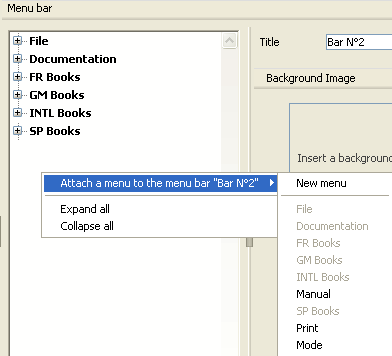
- Using the context menu: Click on a menu bar in order to display its contents in the central list; click with the right-button in this area and select the Attach a menu to the menu bar “bar name” > command, then choose the menu to be used as a sub-menu:
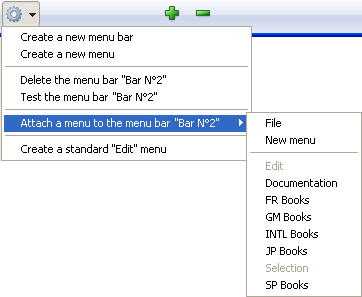
- Using the options menu: Select a menu bar in the left-hand list then click on the options button found below the list; select the Attach a menu to the menu bar “bar name” > command, then choose a menu to be used as a sub-menu:
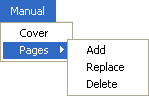
It is possible to attach menus to other menus, in other words, to set up hierarchical submenus. In a menu bar, sub-menus can be used to group together functions organized according to subject within the same menu:
Sub-menus and their items can have the same attributes as the menus themselves (actions, methods, shortcuts, icons, and so on).
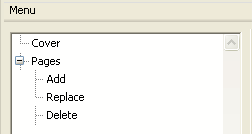
In the Menu editor, sub-menus appear as items of a hierarchical list:
To create a sub-menu, simply associate (attach) an existing menu with the item of another menu. There are two ways to do this:
- Using drag and drop: Select a menu in the left-hand list and drag it onto the item in the central list to which you wish to attach the sub-menu.
- Using the context menu: In the central list, click with the right button on the item to which you want to attach the menu. In the context menu, select the Attach a sub-menu to the item “item name”> command, then choose the menu you want to use as sub-menu:

The menu being attached thus becomes a sub-menu. The title of the item is kept (the original sub-menu name is ignored), but this title can be modified.
The items of the sub-menu keep their original characteristics and properties and the functioning of the sub-menu is identical to that of a standard menu.
You can create sub-menus of sub-menus. Simply expand the sub-menu in the central list and attach a menu to one of the sub-items. You can add sub-menus to a virtually unlimited depth. Note, however, that for reasons concerning interface ergonomics, it is generally not recommended to go beyond two levels of sub-menus.
You can detach a menu from a menu bar or a sub-menu from a menu at any time. The detached menu is then no longer available in the menu bar or sub-menu as the case may be, but it is still present in the list of menus.
To detach a menu, click with the right button on the menu or sub-menu that you want to detach in the central list, then choose the Detach the menu “menu name” of the menu bar “bar name” or Detach the sub-menu of the item “item name”.
It is possible to set “independent” menus; in other words, menus that are not attached to a menu bar or to another specific menu. These menus can be configured in the Menu editor but must be managed using language commands (see Menus).
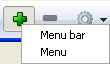
To create an independent menu, select the Menu command from the menu associated with the creation button under the menu bar/menu list:

Product: 4D
Theme: Menus and menu bars
4D Design Reference ( 4D v16)
4D Design Reference ( 4D v16.1)
4D Design Reference ( 4D v16.3)


