
4D v16.3
Setting menu properties
 Setting menu properties
In the right-hand part of the Menu editor, you can set various properties for menu items such as font style, separator lines, keyboard shortcuts or icons.
You can associate a custom parameter with each menu item. A menu item parameter is a character string whose contents can be freely chosen.
Menu item parameters are mainly useful for programmed management of menus, in particular when using the Dynamic pop up menu, Get menu item parameter and Get selected menu item parameter commands.
Groups of menu commands in a menu can be divided by a separator line. This convention is useful for grouping associated menu commands by function.
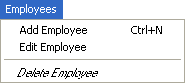
You add a separator line by creating a menu command. Instead of entering the menu command’s text in the current menu bar area, you simply select the Separator Line option. Instead of text, a line appears in the current menu bar area.
Note: Under Mac OS, if you use the dash “-” as the first character of a menu item, it will appear as a separator line. This is especially helpful when using the INSERT MENU ITEM command.
The line appears in the current menu bar area.
Note: When the Separator Line option is checked, the other properties have no effect.
You can add keyboard shortcuts to any menu command. If a menu command has one of these keyboard shortcuts, users will see it next to the menu command. For example, “Ctrl+C” (Windows) or  +C” (Mac OS) appears next to the Copy menu command in the Edit menu.
You can also add the Shift key as well as the Alt (Windows) or Option (Mac OS) keys to the shortcut associated with a menu command. This multiplies the number of shortcuts that can be used with the menu bars created. The following types of keyboard shortcuts can therefore be defined:
- Under Windows:
- Ctrl+letter
- Ctrl+Shift+letter
- Ctrl+Alt+letter
- Ctrl+Shift+Alt+letter
- Under Mac OS:
- Command+letter
- Command+Shift+letter
- Command+Option+letter
- Command+Shift+Option+letter
Note: We recommend that you keep the default keyboard shortcuts that are associated with standard actions.
You can use any alphanumeric keys as a keyboard shortcut, except for the keys reserved by standard menu commands that appear in the Edit and File menus, and the keys reserved for 4D menu commands.
These reserved key combinations are listed in the following table:
| Key | Operation |
| Ctrl+C | Copy |
| Ctrl+Q | Quit |
| Ctrl+V | Paste |
| Ctrl+X | Cut |
| Ctrl+Z | Undo |
| Ctrl+. (period) | Stop action |
Under Mac OS, use Command instead of Ctrl.
To assign a keyboard shortcut:
- Select the menu item to which you want to assign a keyboard shortcut.
- Click on the [...] button to the right of the “Shortcut” entry area.
The following window appears: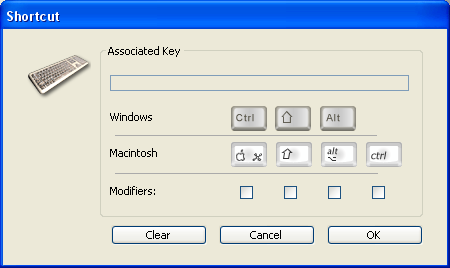
- Enter the character to use then (optional) check the Shift and/or Alt (Option) options according to the combination desired.
Notes:- You can also directly press the keys that make up the desired combination (do not press the Ctrl/Command key).
- You cannot deselect the Ctrl/Command key, which is mandatory for keyboard shortcuts for menus.
- Click OK to validate the changes.
The shortcut defined is shown in the “Shortcut” entry area:
Note: An active object can also have a keyboard shortcut. If the Ctrl/Command key assignments conflict, the active object takes precedence. For information on assigning keyboard shortcuts to active objects, see Keyboard shortcut.
You can specify whether a menu item will appear enabled or disabled. An enabled menu command can be chosen by the user; a disabled menu command is dimmed and cannot be chosen.
Unless you specify otherwise, 4D automatically enables each menu command you add to a custom menu. You can disable an item in order, for example, to enable it only using programming (ENABLE MENU ITEM and DISABLE MENU ITEM commands).
When the Enabled Item check box is unchecked, the menu command appears dimmed, indicating that it cannot be chosen.
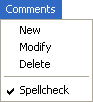
This option can be used to associate a system check mark with a menu item. You can then manage the display of the check mark using language commands (SET MENU ITEM MARK and Get menu item mark).
Check marks are generally used for continuous action menu items and indicate that the action is currently underway:
4D lets you customize menus by applying different font styles to the menu commands. You can customize your menus with the Bold, Italic or Underline styles.
As a general rule, apply font styles sparingly to your menus — too many styles will be distracting to the user and give a cluttered look to your application.
To apply a style, select the menu command you want to modify and then choose the style using the check boxes.
The Item icon option can be used to associate an icon with the selected item. The icon to be used must be stored beforehand in the 4D  . When you click on the area associated with this option, a hierarchical pop-up menu appears so that you can select a picture from the Picture Library:
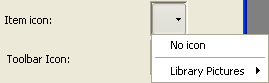
Note: If the picture library is empty, the Library Pictures item is not displayed.
Once set, the item icon appears in the preview area:
It is displayed directly in the menu, next to the item:
To remove the icon from the item, choose the No Icon option from the “Item Icon” area.

Product: 4D
Theme: Menus and menu bars
4D Design Reference ( 4D v16)
4D Design Reference ( 4D v16.1)
4D Design Reference ( 4D v16.3)


