
4D v16.3
Using the Resources explorer
- 4D Design Reference
-
- Resources explorer
-
- Overview
- Using the Resources explorer
- Dynamic synchronization in client-server mode
 Using the Resources explorer
The resources explorer can be used to view and modify the contents of the Resources folder of the current database. It has various controls for adding, deleting, searching and viewing the resource elements.
The resources explorer contains two separate areas: the list of folders and the preview area, each with their own control buttons.
The list of folders displays the hierarchy of the folders found in the Resources folder of the database.
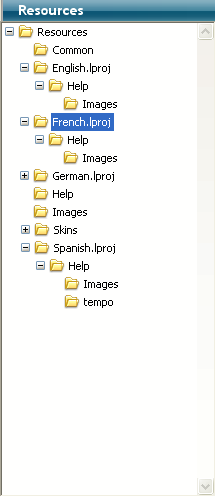
You can select, expand and collapse the folders. When you click on a folder name, any files that it contains are displayed in the preview area (right-hand part of the resources explorer). A control area including buttons and action menus is located at the bottom of the window.
The control area found beneath the list of folders contains the  and
and  buttons as well as an action menu. The button creates a folder in the selected folder or at the top level if no folder is selected. The button deletes the selected folder as well as its contents.
You can also use the context menu in the list of folders. The commands of this menu are the same as those of the action menu.
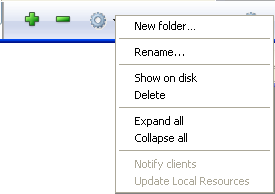
The commands of the action menu are as follows:
- New folder...:: Creates a folder in the selected folder or at the top level if no folder is selected. When you choose this command, a dialog box appears so that you can name the folder to be created. Since the folder will be created physically on the disk, make sure that the name does not contain any characters that are not allowed by the system (such as : or /).
- Rename...:: Displays a dialog box that can be used to rename the selected folder.
Note: You cannot rename the Resources folder itself. - Show on disk (only active in local mode): Displays the folder in a window of the operating system.
- Delete: Deletes the selected folder and its contents.
Note: You cannot delete the Resources folder itself. - Expand all/Collapse all: Expands or collapses all the folders in the list.
- Notify clients (only active in remote mode): Can be used to "force" a notification to be sent to the other client machines indicating an update of the Resources folder contents. The other clients can then carry out immediate or deferred synchronization of their Resources folder according to the general settings or their own local settings (see Update of client machines).
Use this command when you have made changes in the Resources folder and want to request immediate synchronization of the other clients. - Update Local Resources (only active in remote mode): Can be used to "force" the synchronization of the Resources folder locally with that of the server machine.
Use this command when you have been notified that the Resources folder of the server machine has been updated (see Notification of client machines) and the synchronization of the folders is not automatic.
You can also force the global update of the contents of the local Resources folder (download the server folder and replace the local folder) by holding down the Shift key while selecting the Update Local Resources command.
The right-hand part of the resources explorer window is a preview area that displays the files contained in the selected folder (including files found in any subfolders). This area is updated each time the item selected in the list of folders is changed.
This area also has its own specific controls that are found in an action menu located below it:
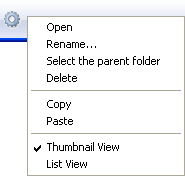
- Open: Opens the file selected in the editor by default, if there is one. This action is equivalent to a double-click on the file.
- Rename...: Displays a dialog box that lets you rename the selected file.
- Select the parent folder: Selects, in the List of folders, the parent folder of the file selected. This command lets you see the precise location of the file within the hierarchy of the Resources folder. In fact, the preview area displays all the files present in the selected folder, including files located in any subfolders.
- Delete: Deletes the selected file.
- Copy: Copies the selected file into the clipboard.
- Paste: Pastes the contents of the clipboard into the folder selected if the clipboard contains a picture or a file pathname. If the clipboard contains a picture, 4D will create a picture file of the corresponding type. A dialog box is displayed so that you can name the created file.
These commands toggle. They set the current display mode of the area.
- In Thumbnail View mode, the files of the selected folder are displayed as thumbnails. Picture type files are previewed (if the picture format is recognized by 4D) and other types of files appear with the system icon.
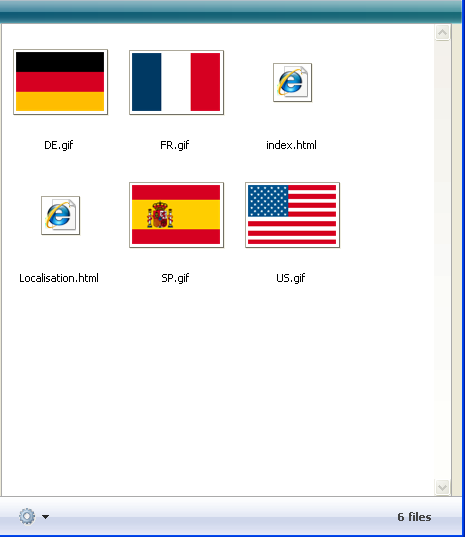
In this preview mode, a context menu provides access to file editing commands.
A help tip associated with each picture provides additional information: pathname (relative), name, type, date and time of modification and size.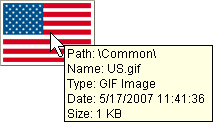
- In List View mode, the files of the selected folder are displayed as a table. For each file, the table provides the name, date and time of modification, size and type directly:

You can sort the table by clicking in the header area of a column.
The resources explorer lets you add items to the Resources folder and its subfolders using drag and drop:
- You can modify the tree structure of the Resources folder by dragging and dropping folders among the list of folders.
- You can also add files to the Resources folder by dragging and dropping from the desktop of the operating system. 4D automatically creates a copy of the dropped file in the Resources folder. You can drop the files in the list of folders or directly in the preview area.
- It is possible to drop folders into the Resources folder. The folder may come from the operating system or from the Resources folder of another 4D application. If the folder being dropped is from another 4D application, it is moved; otherwise, 4D creates a copy (like for files).
You can drop a folder into the list of folders or directly into the preview area. In the latter case, the folder is created at the location corresponding to the hierarchical level displayed in the preview area.
- You can drag and drop pictures coming from the Resources folder into the Form editor and the Method editor. The picture is then inserted as a reference.

Product: 4D
Theme: Resources explorer
4D Design Reference ( 4D v16)
4D Design Reference ( 4D v16.1)
4D Design Reference ( 4D v16.3)


