
4D v16.3
Managing methods
 Managing methods
Methods are created using the Method editor. The Method editor provides you with tools to create, test, and edit any type of method.
This section describes the different ways of creating and opening methods (object methods, project methods, triggers and form methods).
Keep in mind that blank database methods are already created in all the applications; you can just open them from the Explorer.
4D Server Note: Object locking occurs when two or more users attempt to modify the same method at the same time. If a user opens a method in the Design environment, the method is locked. Other users cannot modify this same method until the first user frees it by closing the window. In the meantime, the method can be opened in read-only in order to copy all or part of its elements.
Object methods are created for an object on a form. You start in the Form editor, with a form displayed on the screen.
To create or open an object method in the Form editor:
- Hold down the Alt key (Windows) or the Option key (Mac OS) and click the object.
OR
Select the object, then choose Object Method from the Object menu.
OR
Click the object using the right mouse button and choose Object Method from the context menu.
OR
In the Property List, click the object method Edit... button.
A window of the Method editor appears, blank if you have just created the method.
You can create or open a project method in several ways.
To create a project method from the File menu:
- Choose New > Method... in the File menu or using the New button of the 4D toolbar.
4D displays the New Method dialog box: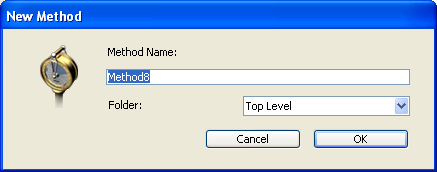
- Enter a method name.
Method names can be up to 31 characters long. They can include letters, numbers, space characters, and underline characters (see Identifiers in the 4D Language Reference manual). - (Optional) Select a folder for storing the method.
If you select a folder name, the method will be placed in this folder. Folders can be used to organize the objects of your application and are managed on the Home Page of the Explorer. By default, the method is created at the Top Level, i.e., outside any storage folder. - Click the OK button.
4D opens an blank Method editor window where you can begin writing the new method.
To create a project method from the Explorer:
- Display the Current form table of the Explorer.
- Highlight the Project Methods item.
- Click the add button
 below the list.
The dialog box where you can name the method and assign it to a folder appears. - Enter the method name and click OK.
To open a project method from the File menu:
- Choose Open > Method... in the File menu.
The Home Page of the Explorer appears (see below).
To open a project method from the Explorer:
- Display the Home Page of the Explorer.
- Expand the Project Methods item, then double-click the name of the method to be opened.
OR
Choose the Edit Method... command of the context menu — right-click on the name of the method to be opened.
The method opens in a window of the editor.
To open a project method from the Menu Bar editor:
- In the Menu editor, click in the “Method Name” area for an item of the current menu bar.
This area contains the name of the method associated with the selected item (if any). - Click on the edit button to the right of the “Method Name” drop-down menu.
The method is displayed in a new Method editor window.
To open a project method from a window of the Method editor:
- In the Method editor, select the name of the project method to be opened.
- Choose Edit Method in the context menu of the editor or type Ctrl+K (Windows) or Command+K (Mac OS).
OR:
Alt+double-click (Windows) or Option+double-click (Mac OS) directly on the name of the project method.
The method is displayed in a new window of the Method editor. If 4D was not able to identify the method, the Home Page of the Explorer is displayed.
You can create a trigger using a shortcut in the Structure editor or you can create it directly in the Explorer.
To create or open a trigger from the Structure editor window:
- Hold down the Alt key (Windows) or Option key (Mac OS) and double-click the table title in the Structure editor window.
OR
In the Inspector window displaying the Table properties, click on the Edit... button.
A Method editor window appears, blank if you have just created the trigger.
To create or open a trigger from the Explorer:
- Display the Current form table of the Explorer window and expand the “Triggers” item.
- Select the table that interests you and click on the add button below the list.
OR
Double-click on the desired table.
The trigger appears in a window of the Method editor.
Form methods can be opened from the Current form table of the Explorer or from the Form editor.
To create or open a Form method from the Explorer:
- Display the Current form table of the Explorer.
- Expand the “Project Form Methods” or “Table Form Methods” item, depending on the type of form for which you want to open the method.
- (Table forms only): Expand the table to which the form belongs.
- Select the form for which you want to open the method.
- Click on the add button below the list.
OR
Double-click the form.
The form method appears in a window of the Method editor.
Note: You can also create or open a form method from the Forms Page of the Explorer: right-click on the name of the form and choose Edit Form Method... in the context menu.
To create or open a form method from the Form editor:
- Choose Form Method from the Form menu.
OR
Click an empty area on the form using the right mouse button and choose Form Method from the context menu.
OR
In the Property List, click the Edit... button located next to the Form Method line.
The form method appears in a window of the Method editor.
You can delete a trigger, form method or project method at any time using the Explorer. You can also delete an object method using the Form editor.
On the other hand, you cannot delete database methods. To disable this type of method, erase all the statements in the method or change them to comments by preceding them with the “//” symbol (used to distinguish comments from executable code). For more information about comments in methods, refer to .
To delete a form method, a project method, or a trigger using the Explorer:
- In the Explorer, display the Current form table.
Make sure the Methods page is displayed, since certain deletion operations cannot be undone. - Expand the method type that corresponds to the method you want to delete (Project Form Methods, Table Form Methods, Triggers or Project Methods).
- Select the table or form to which the method you want to delete is assigned.
OR
Highlight the name of the project method you want to delete. - Click the delete button
 located at the bottom of the Explorer window.
Note: To delete a project method, you can also right-click on the name of the project method and choose Delete Method from the context menu.
- If you delete a form method or a trigger, 4D displays a warning message asking you to confirm the operation. This deletion will be permanent.
- If you delete a project method, 4D carries out the operation directly. However, this deletion is not permanent so long as you have not emptied the Trash (for more information, refer to Trash Page).
You can clear unwanted object methods using the Form editor. In some cases, clearing unneeded object methods can make the database run faster.
To delete an object method:
- Display the form that contains the method(s) you want to clear.
- Select the object(s) that have unwanted object methods attached to them.
- Choose Clear Object Method from the Object menu.
4D removes the object methods from the selected objects.
Note: If you delete an object method by mistake, choose Undo from the Edit menu.
You can import and export, in the form of a file, database, project and object methods, as well as triggers. These commands are found in the Method menu of the Method editor.
- When you select the Export Method... command, a standard file saving dialog box appears, allowing you to choose the name, location and format of the export file (see below). As with printing, exporting does not take the collapsed state of code structures into account and the entire code is exported.
- When you select the Import Method... command, a standard file opening dialog box appears, allowing you to designate the file to be imported.
Importing replaces the selected text in the method. To replace an existing method by an imported method, select the entire contents of the method before carrying out the import.
The import/export function is multi-platform: a method exported under Mac OS can be imported under Windows and vice versa; 4D handles the conversion of characters when necessary.
4D can export and import methods in two formats:
- 4D method (extension “.c4d”): In this format, methods are exported in encoded form. The names of objects are tokenized.
This format is used in particular for exchanging methods between 4D applications and plug-ins in different languages. Conversely, it is not possible to display them in a text editor. - Text (extension “.txt”): In this format, methods are exported in text-only form. In this case, the methods are readable using a standard text editor or a source control tool.
Note: By default, starting with 4D v15, all versions of 4D share the same language and the same input settings for real numbers and dates, which facilitates code sharing between developers through copy/paste or exporting methods. It is still possible to use local settings (as in previous versions of 4D) by checking the Use regional system settings option in the 4D preferences (see the Methods Page section).

Product: 4D
Theme: Editing methods
4D Design Reference ( 4D v16)
4D Design Reference ( 4D v16.1)
4D Design Reference ( 4D v16.3)


