
4D v16
Using a 4D Write Pro area
 Using a 4D Write Pro area

In 4D applications, 4D Write Pro documents are created, imported, and exported by means of specific commands found in the 4D Write Pro theme (WP EXPORT DOCUMENT, WP EXPORT VARIABLE, WP Import document, WP New).
You can also associate a 4D Write Pro area with an Object field in a database form. This way, each 4D Write Pro document is automatically saved with the record and stored in the database's data (see Storing 4D Write Pro documents in 4D Object fields).
You can save and re-open 4D Write Pro documents to and from disk without any loss using the native .4wp format.
The .4wp format consists of a zip folder whose name is the document title and whose contents are HTML text and images:
- HTML text combines regular HTML with 4D expressions (which are not computed) as well as 4D-specific tags,
- images are stored in a folder with the same name as the document title, next to the HTML file.
Since .4wp documents are based on HTML, they can be imported or opened in any external application supporting HTML.
Note: The 4D Write Pro internal document format is a proprietary HTML extension, compatible with HTML5/XHTML5, but which supports its own subset of HTML/CSS attributes and tags. As a result, only HTML documents exported by 4D Write Pro can be opened by 4D Write Pro without any risk of data loss. Importing HTML documents that were created externally could produce errors.
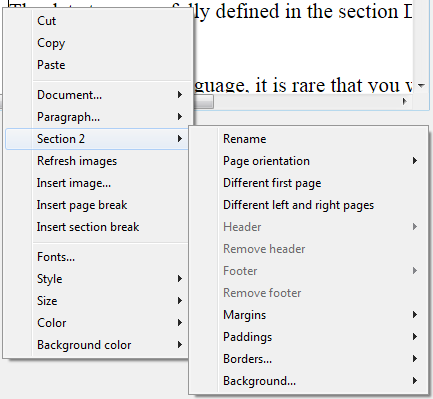
If the Context menu property is checked for a 4D Write Pro area (see Defining a 4D Write Pro area), a comprehensive context menu is available to users in the Application mode:
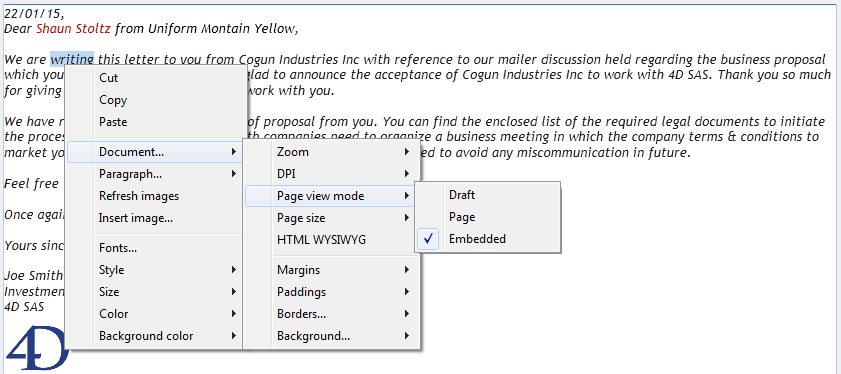
This menu offers access to all the 4D Write Pro user features.
4D Write Pro documents can be displayed in one of three page view modes:
- Draft: draft mode with basic properties
- Page (default): "print view" mode
- Embedded: view mode suitable for embedded areas; it does not display margins, footers, headers, page frames, etc. This mode can also be used to produce a Web-like view output (if you also select the 96 dpi resolution and the HTML WYSIWYG option).
The page view mode can be configured by means of the area pop-up menu:
Note: The page view mode is not stored with the document.
For areas embedded in 4D forms, the view mode can also be set by default using the Property List. In this case, the view mode is stored as a property of the 4D Write Pro form object (for more information, please refer to the Configuring View properties paragraph).
When the document is in Page view mode, the following document properties are displayed for the user:
- Page outlines to represent printing limits
- Page width and Page height (default: 21x29.7 cm)
- Page orientation (default: Portrait)
- Page margin (default: 2.5 cm)
In addition, new paragraph properties are available in the Paragraph... submenu:
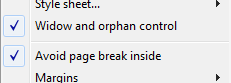
- Widow and orphan control: When this option is checked for a paragraph, 4D Write Pro does not allow widows (last line of a paragraph isolated at the top of a page) or orphans (first line of a paragraph isolated at the bottom of a page) in the document. In the first case, the previous line of the paragraph is added to the top of the page so that two lines are displayed there. In the second case, the single first line is moved onto the next page.
- Avoid page break inside: When this option is checked for a paragraph, 4D Write Pro prevents this paragraph from being broken into parts on two or more pages.
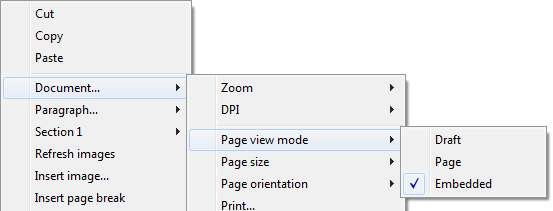
You can also use the following commands found in the context menu:
- Insert page break: Adds a page break attribute at the cursor location. If any text is selected, it is replaced by the page break.
- Document.../Page size: Allows you to select a page size. Various standard page sizes are available.
- Document.../Page orientation: Standard orientation (Portrait/Landscape) property.
Note: When a document is in Embedded or Draft view mode, page properties can be set, even if their effect is not visible. In Draft view mode, the following paragraph property effects are visible:
- Page height limitation (lines drawn)
- Avoid page break inside property
- Widow and orphan control.
4D Write Pro documents support headers and footers. These headers and footers are related to sections.
A section is a part of a document which is defined by a page range and can have its own paging and common attributes. A document can contain any number of sections (from just one, up to the total number of pages). Each page can only belong to one section.
You can define a set of headers and footers for each section.
A section is a subset of continuous pages in a 4D Write Pro document. A document can contain one or more sections. A section can contain any number of pages, from a single page to the total number of pages in the document.
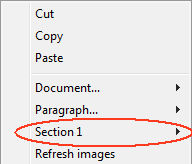
By default, a document contains a single section, named Section 1. The 4D Write Pro contextual menu displays this section number wherever you click in the document:
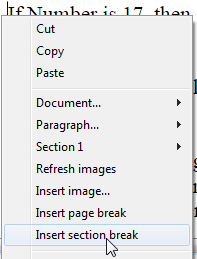
You create a new section by adding a section break in the text flow:
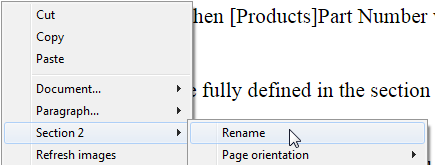
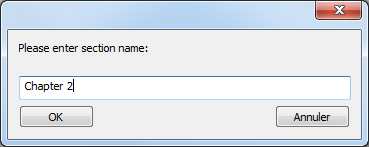
When a section break has been added, the contextual menu displays an incremented number for each section. You can, however, rename any section:
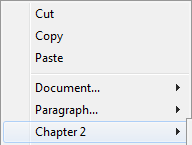
The name you entered is then used as the section name everywhere in the document:
Note that if you have defined a different first page or different left/right pages for a section, the page type is also displayed in the menu (see below).
Sections inherit attributes from the document. However, common document attributes, including headers and footers, can be modified separately for each section. The contextual pop-up menu displays the properties and attributes available at the section level:
- Page orientation: allows you to set a specific page orientation (Portrait or Landscape) per section.
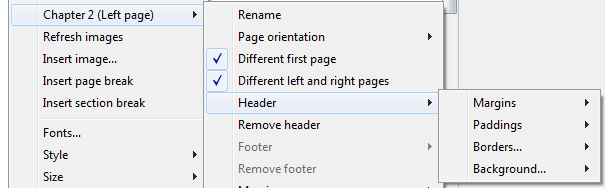
- Different first page: allows you to set different attributes for the first page of the section; this feature can be used to create flyleaves, for example. When this attribute is checked, the first page of the section is handled as a subsection itself and can have its own attributes.

- Different left and right pages: allows you to set different attributes for left and right pages of the section. When this attribute is checked, left and right pages of the section are handled as subsections and can have their own attributes.

- Header and Footer commands: these options allow you to define separate headers and footers. These options are detailed below.
- Margins / Paddings / Borders / Background: these attributes can be defined separately for each section. For more information on these attributes, please refer the 4D Write Pro Attributes article.
Each section can have specific header and footer. Headers and footers are displayed only when the document page view mode is Page.
Within a section, you can define up to three different headers and footers, depending on the enabled options:
- first page,
- left page(s),
- right page(s).
To create a header or a footer:
- Make sure the document is in Page view mode.
- Double-click in the header or footer area of the desired section and page to switch to editing mode.
- The header area is at the top of the page:

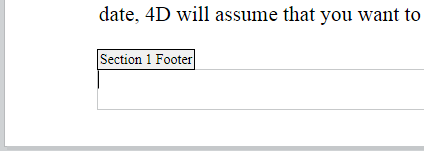
- The footer area is at the bottom of the page:
- The header area is at the top of the page:
You can then enter any static contents, which will be repeated automatically on each page of the section (except for the first page, if enabled).

You can also insert dynamic contents such as the page number or the page count using the ST INSERT EXPRESSION command (for more information, please refer to the Inserting document and page expressions paragraph).
Once a header or a footer has been defined for a section, you can configure its common attributes using the contextual menu:
For more information on Margins, Paddings, Borders, and Background attributes, please refer the 4D Write Pro Attributes section.
You can remove the entire definition of a header or a footer (contents and attributes) by selecting the Remove header or Remove footer command in the contextual menu.
4D Write Pro handles headers and footers of documents converted from the 4D Write plug-in.
The following expressions and properties are also supported and converted from the 4D Write plug-in headers and footers:
- page number and page count variables
- distinct first page
- distinct left/right pages

Product: 4D
Theme: Using a 4D Write Pro area

Modified: 4D v15 R2
Modified: 4D v15 R3
Modified: 4D v15 R5
Modified: 4D v16
4D Write Pro Reference ( 4D v16)


