
4D v16.3
Printing a form
 Printing a form
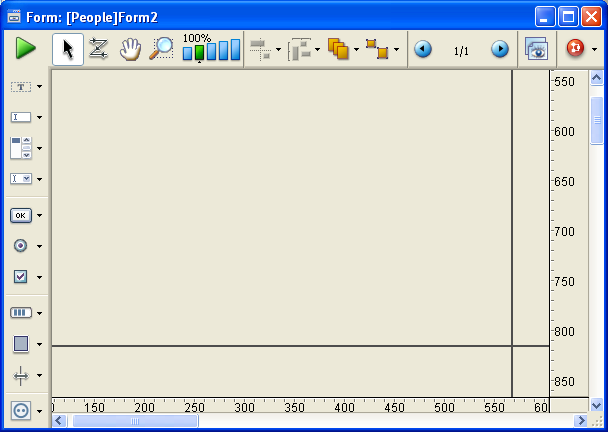
Each form has a maximum area of about 1245 square feet. You scroll to bring hidden portions of the form into view. For viewing on screen, your form design can use this entire area. You can scroll to view any element you place in the form.
For printing, form elements must fit within a single page width, but may be several pages in length. The actual size of a page depends on your printing device, the paper it is using, and the specifications you enter in the Page Setup dialog box. 4D displays page border lines in the Form editor. These lines indicate the page limits. The page border lines respond to any page setup changes. The page setup specifications are stored with the form when it is closed. The form’s limits can be displayed or hidden using the Paper command in the Display submenu of the Form editor (see Showing/hiding elements in the Form editor).
The figure below shows the page border lines:
You can set specific print settings for each form. These settings will be taken into account when the form is printed in Application mode.
To do this, click on the Settings/Edit... button in the “Print” theme of the Property List of the form (see Form properties).
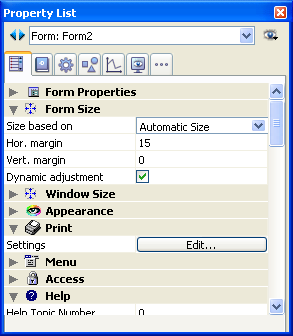
A Print Setup dialog box appears, which lets you modify the specific print settings of the form: paper format, orientation, etc. The options available in this standard dialog box depend on your system configuration.
For more information about printing records in Application mode, refer to Printing records.

Product: 4D
Theme: Managing forms
4D Design Reference ( 4D v16)
4D Design Reference ( 4D v16.1)
4D Design Reference ( 4D v16.3)


