
4D v16.3
Importing and exporting data via an ODBC data source
- 4D Design Reference
-
- Exporting and importing data
-
- Introduction
- File formats
- Field, record, and file delimiters
- Importing data from files
- Exporting data to files
- Importing and exporting data via an ODBC data source
- Saving and loading import and export settings
 Importing and exporting data via an ODBC data source
4D lets you import and export data from or to an ODBC data source.
The ODBC protocol (Open DataBase Connectivity) is an interface allowing different applications to communicate between each other using SQL language. An ODBC data source is a permanently open “window” to a document belonging to an application, even when this application is not open. Many applications (databases, spreadsheets, data managers, etc.) allow publishing data as an ODBC source using a specific ODBC driver.
Any application supporting the ODBC protocol can read or write data in an ODBC source. The 4D import function allows getting data from an ODBC source while the export function allows inserting data into the ODBC source.
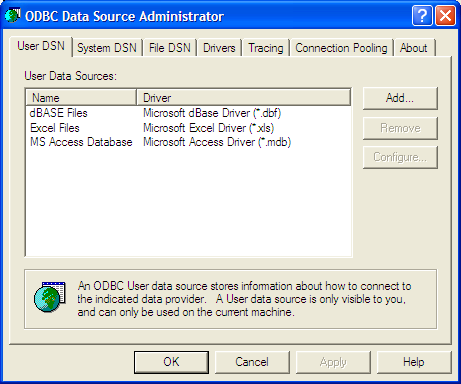
Under Windows, the definition of an ODBC source is carried out using the Administrative Tools then Data Sources (ODBC) configuration panel:

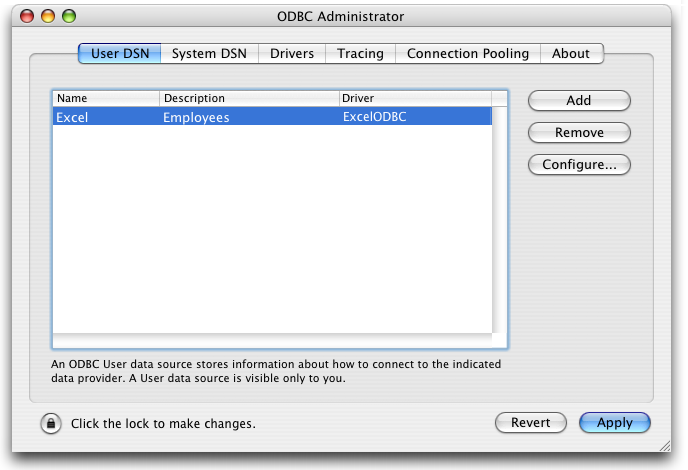
Under Mac OS X, the definition of an ODBC source is carried out using the ODBC Administrator program located in the Utilities folder:
For more information on these dialog boxes, refer to the operating system documentation.
The concept of importing data from an ODBC source is the same as when importing other types of data (see Importing data from files), with the exception that an intermediary dialog box allowing you to select an ODBC source is used.
In the Application environment, importing can be carried out using the IMPORT ODBC command. In the Design environment, it is done using the File menu of 4D.
To import data from an ODBC source:
- Choose the Import > From ODBC Source... command in the 4D File menu.
The ODBC login dialog box appears: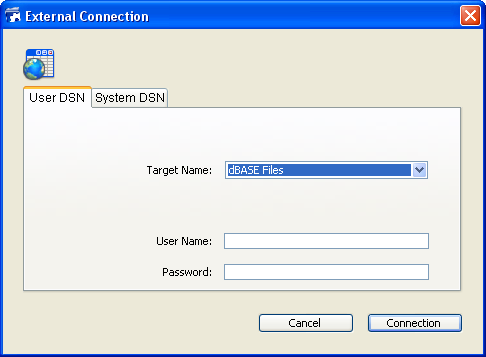
- Select the data source to use as well as (if necessary) the access IDs then click Connection.
The standard 4D import data dialog box appears. - On the right side of the dialog box, set the SQL table from which you wish to import data:
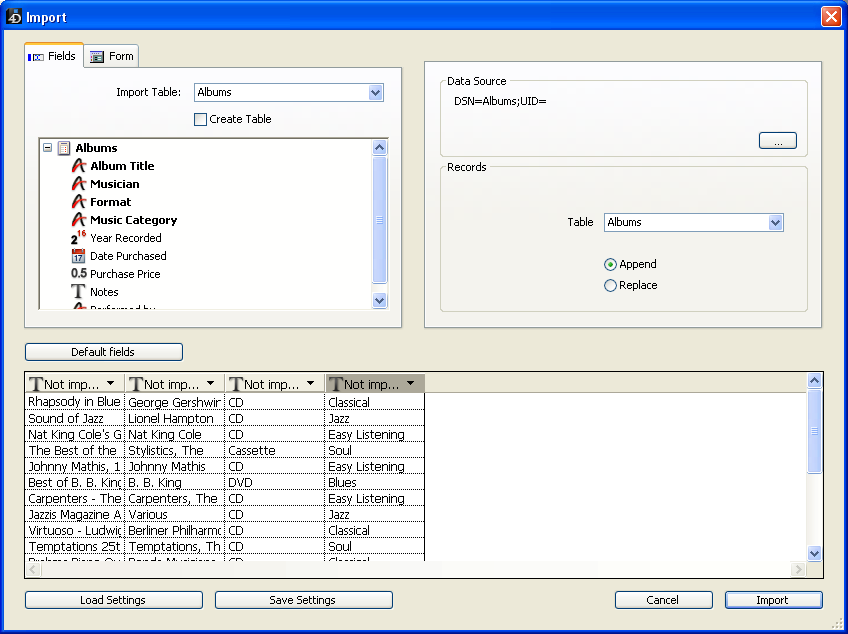
- Select the table and 4D fields into which the data must be imported or check the Create a table option (this option is not available for compiled databases).
Like all other kinds of imports, the preview area displays matches between imported data and fields. You can also click the Form tab and import data using a form. For more information about these functions, refer to the Importing data from files section. - Choose import options on the right side of the dialog box:
- Data Source: This area describes the data source to which the database is connected. You can display the select data source dialog box again by clicking [...].
- Records: You can add or replace the records of the import table with data coming from the source.
- Click Import to import the data.
Once the data is imported, the connection between 4D and the data source is automatically closed.

Product: 4D
Theme: Exporting and importing data
ODBC,
4D Design Reference ( 4D v16)
4D Design Reference ( 4D v16.1)
4D Design Reference ( 4D v16.3)


