
4D v16.3
Help Tip editor
 Help Tip editor
You use the help tip editor to create and test help tips that you can then associate with database objects.
To display this editor, click on the Help Tips button in th 4D tool box:
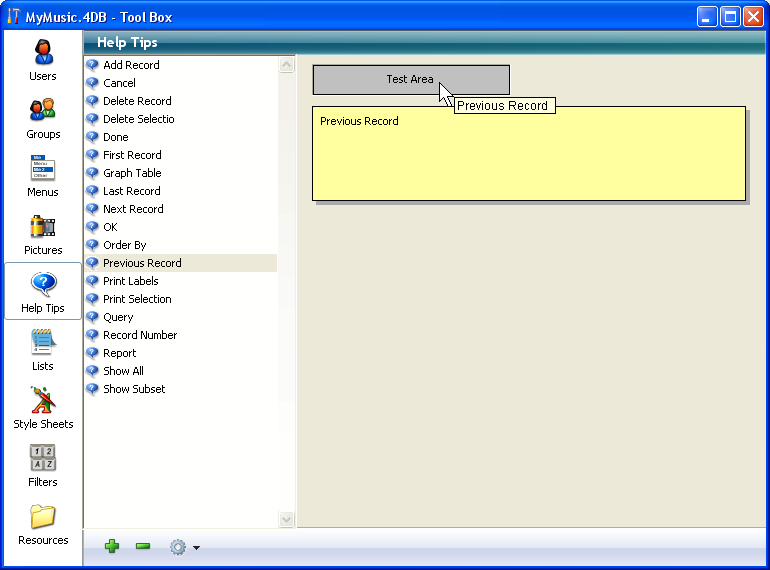
- The list on the left contains the names of help tips that have already been created. The editor includes help tips that are generated automatically by the Form creation wizard or for the default forms.
- The gray area where you test the help tips.
- The yellow area is where you enter the text of help tips
To create a help tip using the Help Tip editor:
- Click on the add button
 or choose Add in the context menu of the list area (right-click in the list area).
A new item, named “Help text #1” by default, is added to the list. - (Optional) Modify the name for the help tip.
The name of the help tip is used for reference in the application; it does not appear to the user. You can use up to 15 characters.
You can modify this name subsequently by holding down the Alt (under Windows) or Option (under Mac OS) key before clicking on the name of the help tip so that it becomes editable. You can also use the Rename command of the context menu or options menu in the list area.
If you do not modify the default name, 4D will create other help tips named Help text#2, Help text#3, and so on by default.
Note: Help tips that are entered directly in the Property List are not added to the list of help tips..
The help texts are listed in alphabetical order. When you add a new help tip, the contents of the list is automatically updated accordingly. - Press the Tab key or click in the entry area and type the text of the help tip.
You can enter up to 255 characters and use dynamic references but not XLIFF references (see Using references in static text). Note that field or variable type dynamic references are not displayed in the test area of the editor. - (Optional) Test the display of the help tip by placing the mouse cursor over the test area, without clicking.
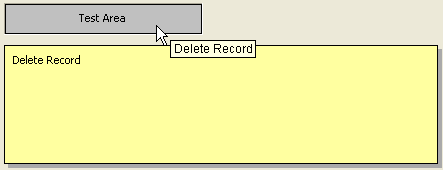
This way you can view the help tip as it will appear in the database. - If you want to create another help tip, click on the add button or select the Add command in the context menu of the list area (right-click).
OR
If you want to create a new help tip based on an existing one, select it in the list and use the Duplicate command of the context menu or the options menu in the list area.
You can modify any help tip by selecting it and changing its contents. Press the Tab key or click outside of the area to validate your changes.
You can delete any help tip by selecting it and clicking on the delete button  or by choosing the Delete command in the context menu of the editor.

Product: 4D
Theme: Help tips
4D Design Reference ( 4D v16)
4D Design Reference ( 4D v16.1)
4D Design Reference ( 4D v16.3)


