
4D v16
Installation on Windows
- 4D ODBC Driver
-
- Installation on Windows
- Installation on OS X
- Using a connection string
 Installation on Windows

4D provides two versions (a 32-bit and a 64-bit) of the ODBC Driver installer for Windows. You can download one (or both) of the following files from the 4D web site:
- 4D_ODBC_Driver_vXX_(32-bit).exe
- 4D_ODBC_Driver_vXX_(64-bit).exe
You choose your driver based on the version of your ODBC client, and not that of your 4D or 4D Server. For example, if you are using a 32-bit version of Excel 2010 with a 64-bit 4D Server, then you'll need a 32-bit ODBC Driver. You can even install both of the drivers on the same machine.
Remember to uninstall any previous versions of ODBC Driver before installing a new one.
Note: If you install the 32-bit Installer on a 64-bit OS, you must use the 32-bit ODBC Data Source Administrator instead of the default 64-bit one.
You can retrieve the appropriate ODBC administrator at the following locations:
- 32 bits: C:\WINDOWS\syswow64\odbcad32.exe
- 64 bits: C:\WINDOWS\system32\odbcad32.exe
Warning: The 32-bit administrator is found in "syswow64" and the 64-bit one is in "system32." Since this is not intuitive, you need to make sure not to mistake one for the other.
For more information about the ODBC Data Source Administrators, please refer to the following Microsoft technical note:
A DSN (Data Source Name) is a set of registry keys that enables an application, the ODBC client, to link to the native SQL Server of 4D or 4D Server. Applications such as Crystal Reports®, Word and/or Excel can all be OBDC clients, and you can also write your own OBDC client using Python, PHP, C, C++ or any language that enables ODBC use.
After running the ODBC Driver installer, you need to define a DSN in order to connect to the desired database.
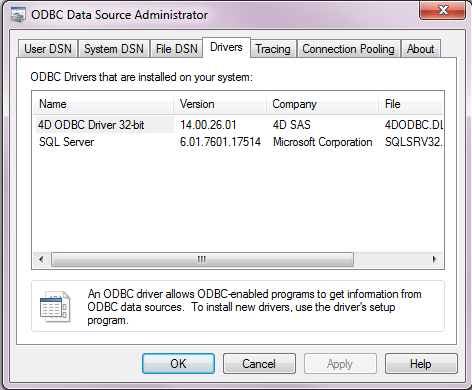
To add a DSN, you launch the ODBC Data Source Administrator by selecting Start/Control Panel/Administrative Tools/Data Sources (ODBC).
Click on the "Drivers” tab to check that the 4D ODBC Driver is correctly installed:
To add a DSN using the 4D ODBC Driver:
- Click on one of the following tabs:
- “User DSN” (if you want to make this data source available only to the user currently logged on to this computer. This data source can only be used on the current machine).
OR - “System DSN” (if you want to make this data source available to all users from this computer, including NT services)
- “User DSN” (if you want to make this data source available only to the user currently logged on to this computer. This data source can only be used on the current machine).
- Click the Add button and choose the 4D ODBC Driver from the list of configured drivers:
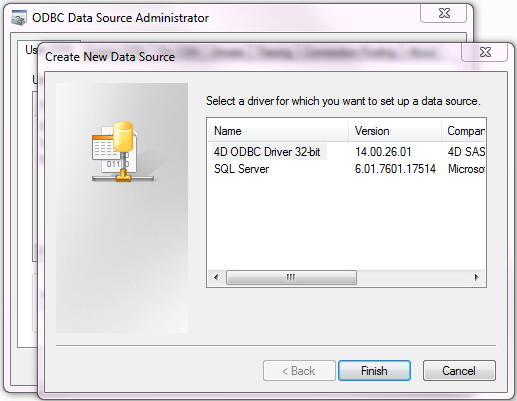
- Click Finish.
The 4D ODBC Driver’s own configuration panel appears: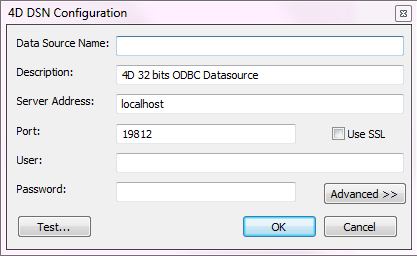
Note: When you select an existing DSN and click on the Configure... button, this same dialog appears pre-filled with all the DSN characteristics. - Click OK to save any changes before you close the configuration panel window.
The fields of these dialog boxes need to be filled in with the following information:
- Data Source Name:
Enter a unique name for this Data Source.
Default: "".
This field is mandatory. - Description:
Enter a short description of this Data Source.
Default: "".
This field is optional. - Server Address:
Examples:"localhost" The 4D application is located on the local machine. "PC-1" The 4D application is located on the PC-1 machine, published on port 19812 (default port). "148.1.2.3" The 4D application has the IP address 148.1.2.3.
Default: "localhost".
This field is mandatory. - Port:
Enter the 4D access port.
Default: "19812".
This field is optional. - SSL checkbox:
Checking this option enables connection to the 4D Server if the “Enable SSL” option has been set on the SQL/Configuration page of the Database Properties. - User:
Enter the user name used to test the connection with 4D.
Default: "".
This field is optional. - Password:
Enter the password used (in conjunction with the user name) to test the connection with 4D.
Default: "".
This field is optional. - Test button
Tests the connection with the current parameters.
Uses “User Name” and “Password” fields to login.
Clicking on the Advanced >> button gives you access to additional options as shown here:
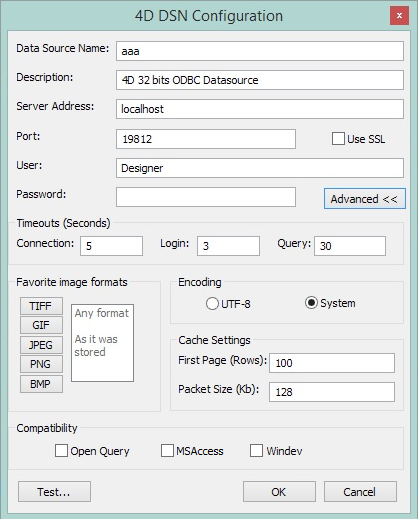
Timeouts (Seconds)
- Connection:
Enter the timeout in seconds to be used (0 means no timeout) after you log in for the driver to connect to a socket on the server:port address.
Default: "".
This field is optional. - Login:
Enter the timeout in seconds to be used (0 means no timeout) when the driver sends a request and receives the status from the server.
Default: "".
This field is optional. - Query:
Enter the timeout in seconds to be used (0 means no timeout) when waiting for a response after a query to the server.
Default: "".
This field is optional.
Favorite image formats
Pictures stored in 4D databases are retrieved by ODBC as Blobs. This setting lets you select the formats you prefer. By default, if you do not choose any favorites, 4D selects the best format available with respect to screen display.
When you choose one or more formats, 4D only provides one of those formats (in order of preference). If there are no pictures available in any of your favorite formats, 4D converts the pictures to the first format in the list.
For example, if you have selected GIF and JPEG as your favorite image formats: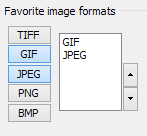
4D first checks whether there are any .gif or .jpeg formats available. If neither are available, then it converts the formats to .gif since it is first in the list.
Encoding: sets the text encoding.
- UTF-8 (Unicode) (recommended)
- System (depends on the settings of your OS)
Cache Settings: used to modify how the network handles the cache. Generally, these settings should be left untouched.
Compatibility: settings to enable the ODBC Driver to work properly with OpenQuery, MSAccess and/or Windev. They should only be checked if you encounter problems with these particular applications.
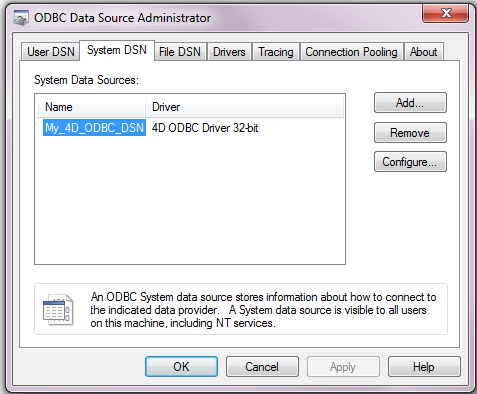
If you intend to completely remove a 4D ODBC Driver, you must first remove all the Data Source Names created for this driver. This can be done from the ODBC Data Source Administrator:
If you only intend to upgrade a 4D ODBC Driver, you do not need to remove the attached DSNs.
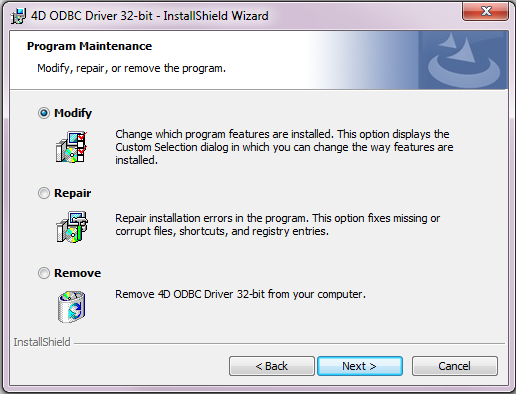
To remove a 4D ODBC Driver, simply launch the 4D ODBC Installer and choose the Remove option; the installer will take care of the rest:

Product: 4D
Theme: Installation on Windows
4D ODBC Driver ( 4D v16)


